
Using a sourdough starter instead of commercial yeast makes these hot cross buns much easier on your digestive system, and gives them a lovely depth of flavour.
It hasn't become that apparent on my blog yet, but I've become an avid fan of sourdough baking. I've just posted how to get your own simple sourdough starter off the ground in four days, so that now I can share some of the things I've been baking - you can find the instructions here - and there's no special equipment needed, you'll be glad to know, just (rye) flour and water!

You can, of course, 'cheat' and beg, borrow or buy a sourdough starter rather than getting your own going, but it's easy enough to do, and I think more satisfying! So, it took a little experimentation to get the spicing levels and amount of dried fruit to my tastes, and I've given you the option to include some wholemeal flour in the final dough if you want, which is more absorbent and gives you a firmer dough which is a little easier to work with, and has a little more depth to it - but they're delicious either way!
If you like your glaze really thick and sticky, go for the apricot jam/glaze option, and if you like it to be more of a thin but shiny glaze, then go for the orange juice syrup option. I do like my buns to be packed with fruit (hence the 'luxury' part) and a heady amount of spices and zesty flavours, so if you want something more subtle reduce the ground spices by a third (to 2 tsp cinammon, and 1 tsp mixed spice) and reduce the dried fruit to 100g sultanas / raisins (in total) and 60g mixed peel, with the zest of one orange only. Obviously, you could just use a pre-mixed blend of dried fruit and citrus peel if you prefer to the appropriate overall weight (250g). You can't go too far wrong really, people have been making hot cross buns forever with all kinds of variations!
If you haven't made anything sourdough before, it's pretty versatile, in that you can prove things at room temperature, or in a warm place for a few hours at the different stages, or you can put it somewhere colder for longer, or even in the fridge to prove overnight, or a combination. Dough proves much more slowly in the fridge, whereas if you put it in a cold oven, with a large dish of boiling water at the bottom, or a warm airing cupboard it will prove much more quickly.
So you can make them to suit you, around your lifestyle - maybe make the sponge and knead with the soaker the night before, pop in the fridge, and then do the rest the next day, or start in the morning or at lunchtime, and do during the day. I'll give options in the method and you can choose what suits you. Basically, you need to make an initial quantity of wet dough (the sponge / preferment) and prove that, then add to a drier dough (the soaker) to make the final dough, and prove, shape, prove and bake. It's easy, I promise! I've put alternate, longer ways of proving the dough in square brackets in case you want to start this off the day before you bake it, etc.
So, here we go, and I hope you enjoy them!
Ingredients
I've broken the ingredients down into stages, to make it easier to follow the recipe in general - don't be daunted!
Sponge / Preferment dough
- 75g sourdough starter (preferably 100% hydration rye starter)
- 85g water (30-37C, non-chlorinated)
- 140g strong white bread flour
Soaker / Mixer dough
Use the maximum amounts for spices and orange zest if you like your buns full of flavour
- 250g full fat milk
- 50g unsalted / slightly salted butter
- 1 tsp fine salt
- 80-100g sugar (golden caster / raw sugar)
- 400g strong white bread flour OR 300g strong white bread flour plus 100g strong wholemeal flour (and an optional 15ml tbsp gluten flour if you're using the wholemeal. Not essential)
- 2 to 3 tsp ground cinnamon
- 1 to 1.5 tsp ground mixed spice
- Good grating of nutmeg
- Zest of 1 to 2 oranges
- 1 medium egg, lightly beaten (weight around 58g)
Dried fruit and peel
- 100g sultanas
- 75g raisins
- 75g mixed (candied) peel
Paste for the crosses
- 50g plain flour
- 65-75g water
Glaze
- Juice of 1 orange (approx 70ml / g)
- 40g sugar (golden caster / raw sugar)
- 4-5 tbsp apricot jam or glaze
(But don't worry, it's not all essential)
- Kneading machine - any kind of food processor or similar with a kneading function will save you time or effort - but not essential, you can knead by hand
- Mister - anything you can use to mist water with - you can buy really cheap pump action bottles to spray with, from the travel section of supermarkets and chemists. Again, not essential
- One large, or two small baking trays for your buns - plus greaseproof baking paper to line them with
- Something to pipe the crosses onto the buns with - a small plastic food bag with the very tip cut off will suffice if you don't have anything else to hand
- Pastry brush to apply the glaze to the buns with
Method
[I've put any Thermomix tips in bold italics, if you're using one]
1. First make your initial 'sponge / preferment dough'. Get your water warm, but not hot - around 30-37C if you're measuring the temperature [Thermomix heat 100g for 2 minutes / 37C / Speed 2, then weigh out 85g into a bowl], stir in the starter thoroughly, then add the flour and mix until evenly incorporated and cover. This will need around 4 hours to ferment at a warm-ish room temperature or in the airing cupboard [or 12-16 hours at 10C / 50F (e.g. somewhere cool, like a garage etc.) or pop in the fridge overnight if you prefer]. Leave until approximately doubled. If it has started to wrinkle at all on the surface, it's done.
2. Half an hour before you're ready to knead your final dough, you need to make your 'soaker / mixer dough'. I generally put this on around 3 1/2 hours after I've made my initial sponge (as above). Heat the milk and butter together with the salt and sugar very gently in a pan until the butter has just melted and the salt and sugar has dissolved, and then allow to cool until just warm again (30-37C), then mix in all the other ingredients for the soaker / mixer dough, and set aside for 30-60 minutes. [Thermomix: add milk and butter to bowl, mix 20 seconds / Speed 5, scrape down, then add salt and sugar and warm 5 minutes / 37C / Speed 2. Add egg and mix 3 seconds / Speed 4. Add all other ingredients for the soaker / mixer dough and mix 15 seconds / Speed 6. Leave resting in the bowl for 30-60 minutes].
3. Now you're ready to knead together your sponge and soaker doughs to make your final dough. You don't want to pulverise your dried fruit, so mix and knead the doughs together first until silky and elastic. If using all white flour your dough will be stickier. If you're kneading by hand, there's a quick demonstration here of how to knead sticky doughs using Bertinet's method. [Thermomix: add your sponge / preferment dough to the bowl with the soaker / mixer dough in it. Set it to knead for 5 minutes and keep an eye on the machine].

5. Cover the bowl of dough with cling film / glad wrap or a damp tea towel, and either put somewhere at a warm-ish room temperature to prove for a couple of hours or so, until increased in volume to almost double [or put in the fridge overnight to prove, then take out the next day to divide and shape].

 |
| Room to expand - they can be nearer if you like them joined |

9. Place an old metal tray or dish in the lower part or bottom of the oven, add some boiling water to create steam and immediately place your buns into the middle of the oven, shut the door and turn the oven on to Gas Mark 7 / 425F / 220C / 200C Fan Oven. Cook the buns for around 20 minutes until the tops are golden brown, but the crosses still white, and the buns are risen and cooked through. You may need to carefully turn them after around 15 minutes if your oven is hotter on one side than the other.
10. Meanwhile make the glaze. Put the orange juice and sugar into a small pan and bring to the boil. Keep bubbling for a couple of minutes to make a light syrup. [Thermomix: cook for 3 minutes 30 seconds / Varoma temperature / Speed 2]. Alternatively you can warm through the apricot glaze / jam until melted and runny for a thicker, stickier glaze (sieve out, or avoid any large lumps).
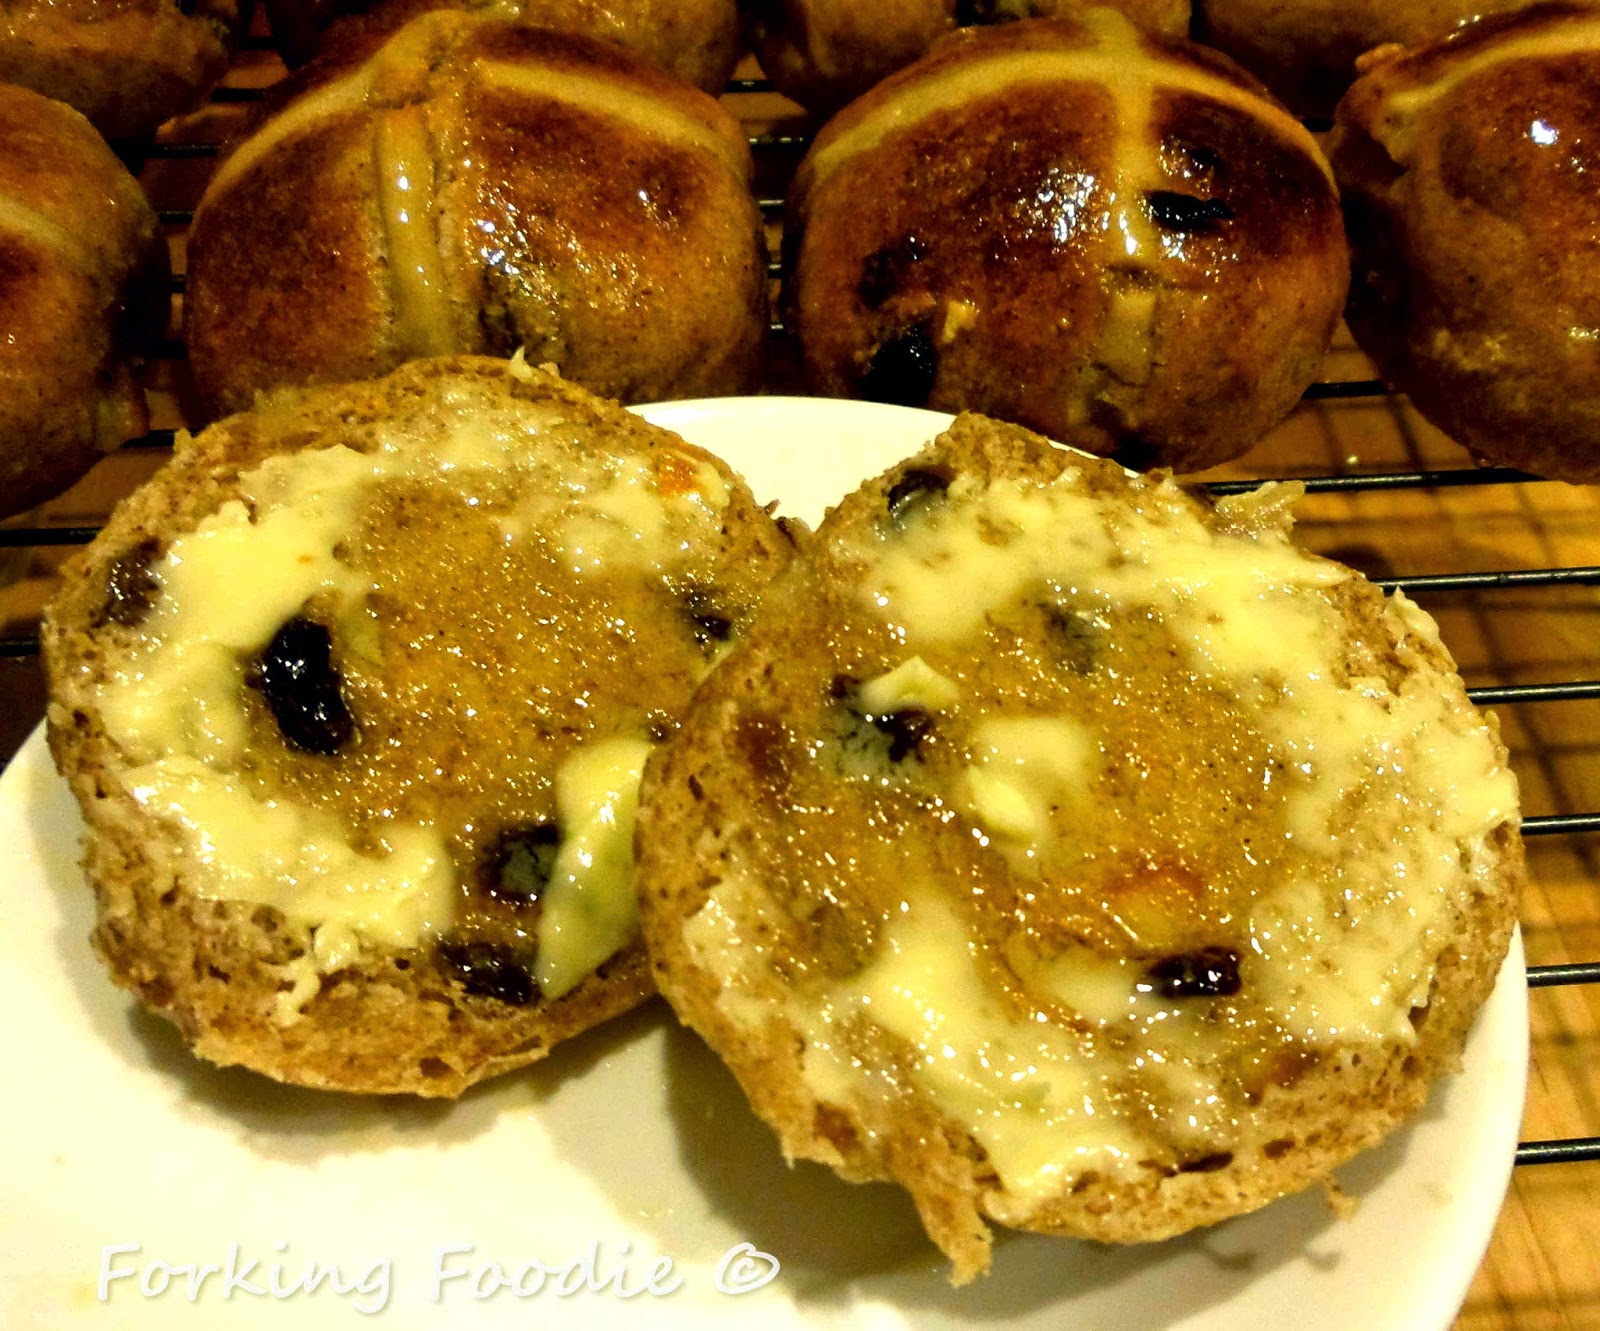
11. Remove the buns from the oven when cooked, and transfer to a wire rack. While they are still warm, brush over the warm glaze with a pastry brush, and leave to cool. Once completely cool, store in an airtight container (separate layers with greaseproof paper), or freeze. Serve toasted with lashings of butter!
 |
| Sourdough Hot Cross Buns made with white flour, only 150g fruit and an apricot glaze |
 |
| And also made with 100g wholemeal flour, fruit as above and an orange syrup glaze |
Great recipe, lovely result, thank you. Enjoyed having a thermomix version, will make them again this week.
ReplyDeleteFantastic - I'm so glad you liked them, thank you for your comment! :)
Delete